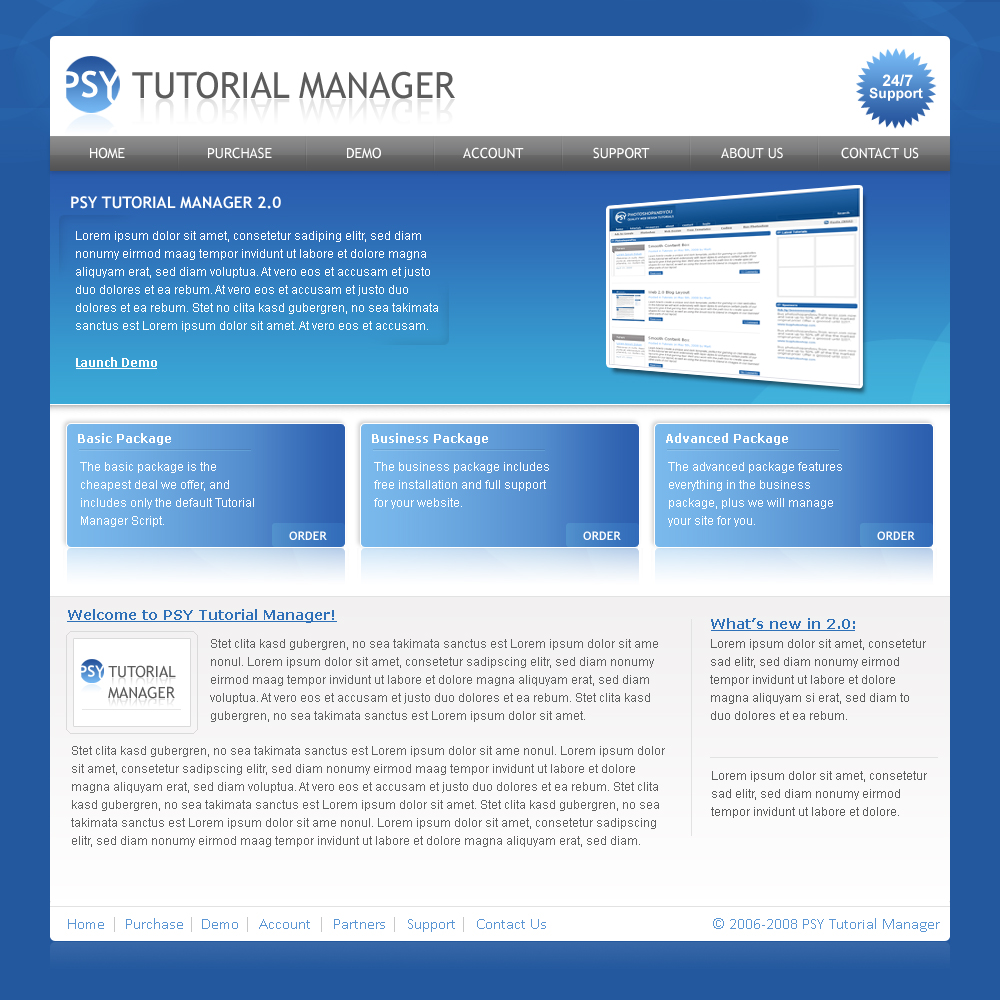
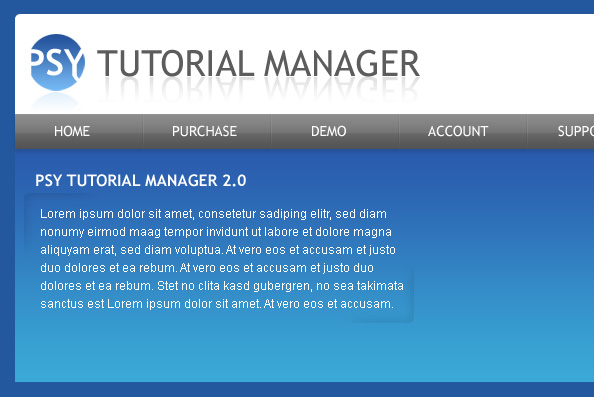
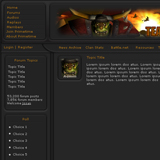
Here is the layout that we will be creating:
Step 1
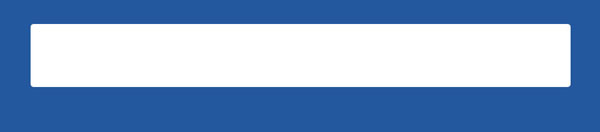
Create a new 1000×1000px document and give it a background color of #23589e. Set your foreground color to white, then grab the Rounded Rectangle Tool(U) and set the radius to 5px and use a fixed size of 900×105px. Create a new layer and make your shape, this will be the “banner” of our design.
Step 2
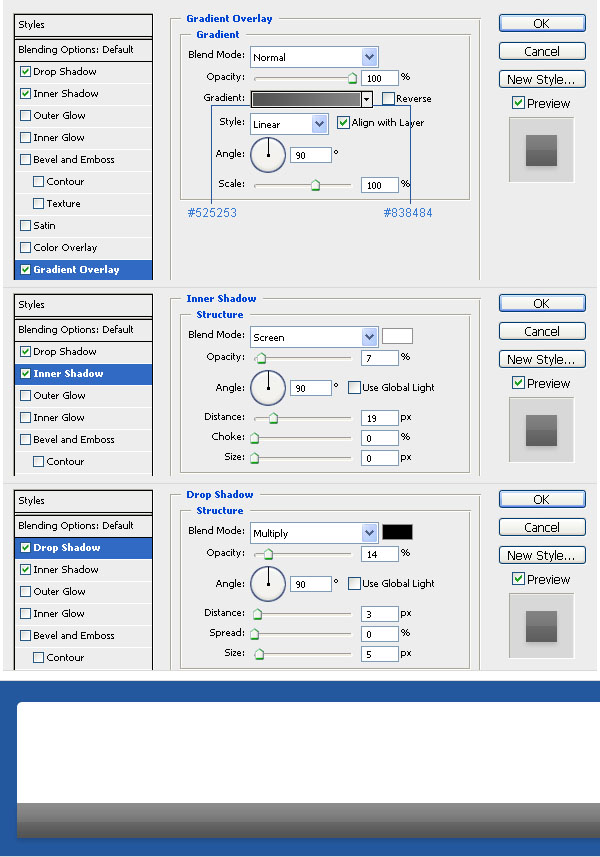
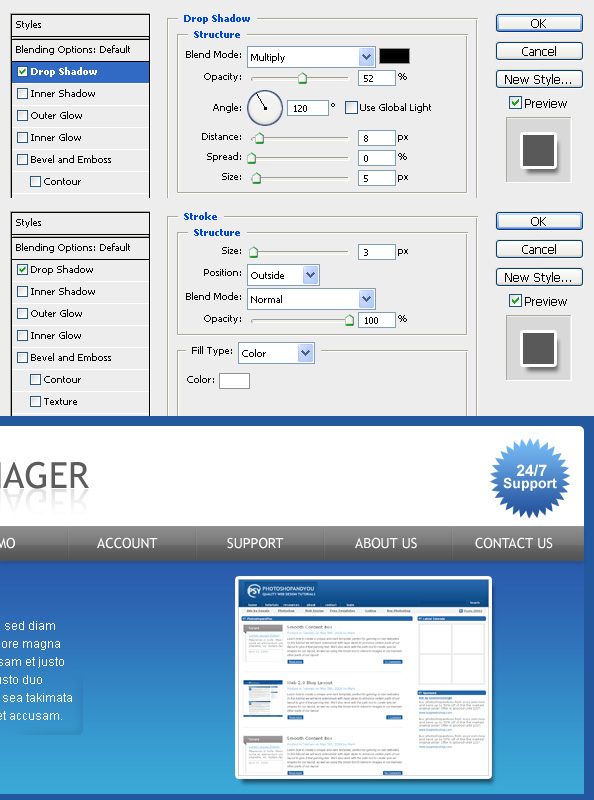
Before we make our header logo and support button, lets make our navigation bar first so we can see what we are doing better. Create a new layer and select the Rectangle Tool(U), use a fixed size of 900×35px and create your nav bar. Move it up so that it covers the two bottom rounded corners of our header shape, and then apply this layer style:
Step 3
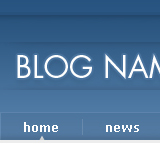
Now lets add the links to our navigation. For my links I used Trebuchet MS, which is a default windows font, size 14 regular with an anti-alias of smooth.
To make the little indented line that separates our links, first set your foreground color to black, then create a new layer and name it “black”. Grab the Pencil Tool(B) and drag from the top of the nav bar to the bottom, making a black line. Go to the layer palette and duplicate the layer by either right clicking it and selecting “Duplicate Layer…” or dragging it onto the new layer icon at the bottom of the palette. Name the new layer “white” and press Ctrl+I to invert it.
Now we play with the opacity of the layers so that they blend into each other and the background to give us our indented line. Setting the white layer’s mode to Overlay usually helps soften it. I ended up setting the opacity of the white layer to 12%, and the opacity of the black layer to 8%.
Now its time to soften the edges of the line using the eraser tool as a brush, but first we need to merge the layers together. Because the white layer is set to overlay, we need to move the black layer above the white layer in the layer palette, then press Ctrl+E to merge them together. Once that’s done, grab the Eraser Tool(E) and set the mode to brush. Using a 45px soft round brush, brush away the top and bottom edges of the line, to make it “fade away”. Duplicate this layer for as many links as you need to add. You should end up with something like this:
Step 4
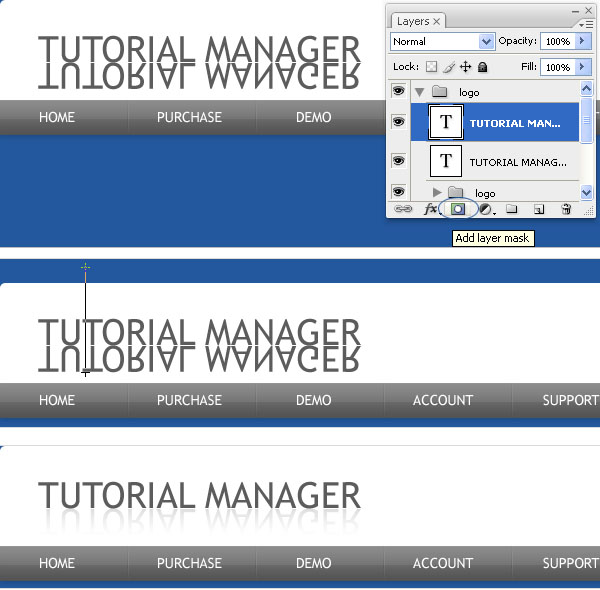
Lets backtrack and finish making our header. For the “Tutorial Manager” text, I used Trebuchet MS, size 36, color #5c5c5c, anti-alias set to smooth. Then duplicate the layer, and go to Edit>Transform>Flip Vertical. Using the Move Tool(V) move it under the original text layer, leaving 1 px between the two layers. Then add a Layer Mask.
Now grab the Gradient Tool(G) and in the toolbar at the top of your screen, choose the “Foreground to Transparent” gradient setting. Then drag from the bottom to the top to create the reflection. This could take a couple of tries to get it to look how you want it to, just keep playing with it until you like the result.
Step 5
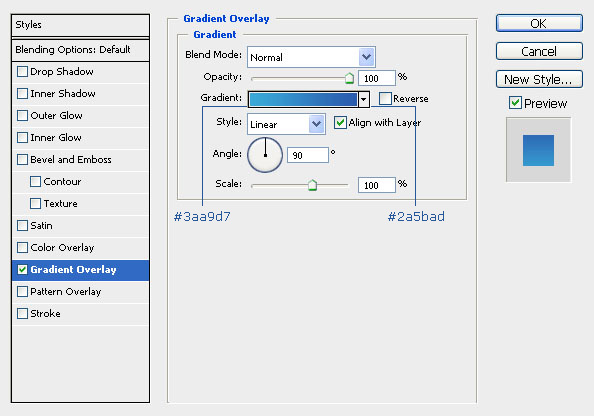
Since I didn’t actually have a real logo to use for this, I threw one together really quickly. If you want to make it, create a new layer and using the Ellipse Tool(U) while holding shift, make a circle. Then add your text, I used the same font that we used in step 4. Apply this layer style to your circle, then repeat the reflection process we used in step 4. The only exception is that since we’re reflecting a gradient, when you duplicate the circle layer, go to layer style and uncheck the “Reverse” option.
Step 6
For the 24/7 support button, use the Custom Shape Tool(U) and select the shape that looks like our button below. Use the same gradient that we used for our logo, only uncheck the “reverse” option in the layer style. I used Arial, size 14, anti-alias of smooth for my support text.
Step 7
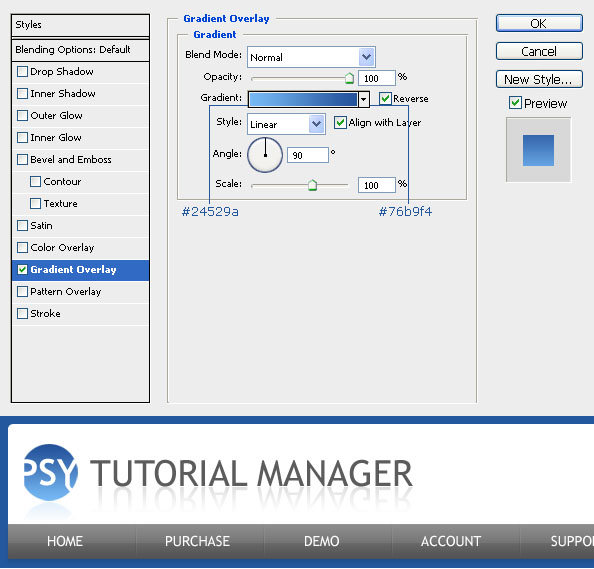
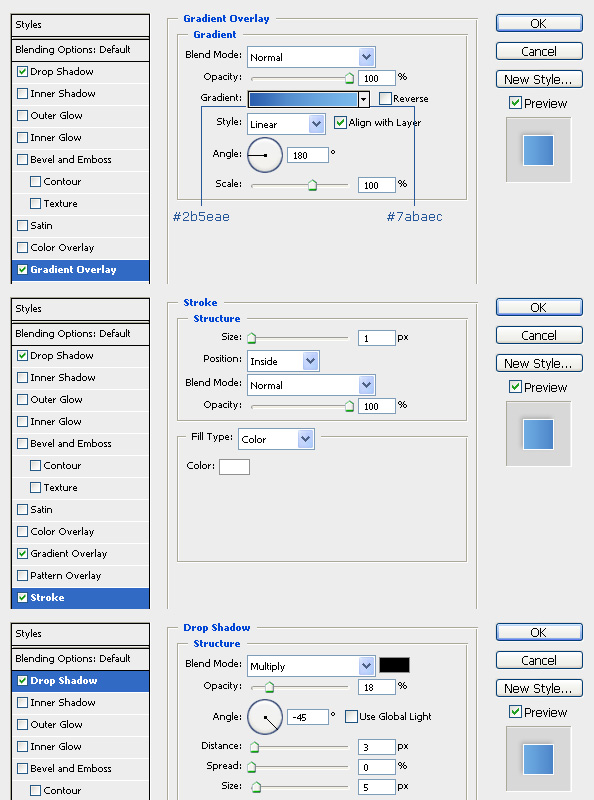
Now lets create the area of our website that will showcase our main product. Under your navigation bar layer, create a new layer. Use the Rectangle Tool(U) with a fixed size of 900×233px. Make your shape, move it so it’s directly under your navigation, and apply this gradient:
Step 8
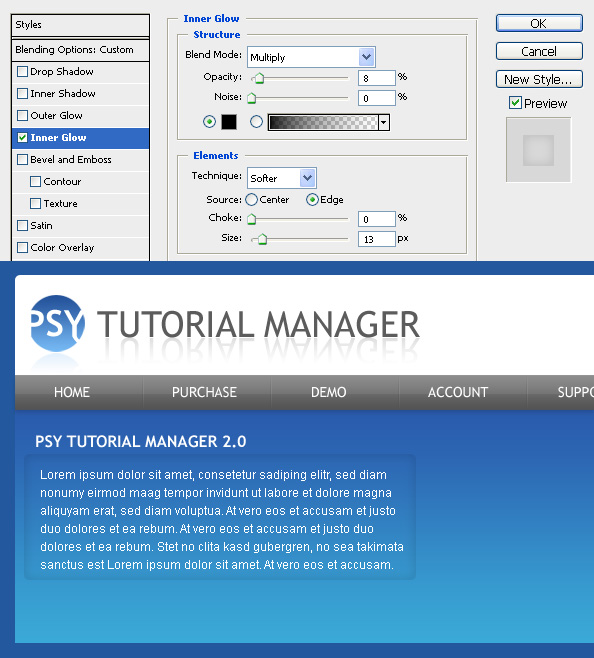
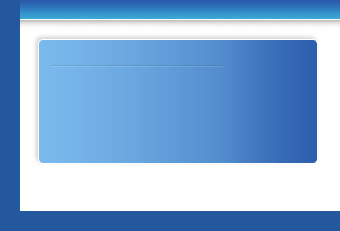
Add the name of the product you want to market, then add a paragraph of text beneath it. Make a new layer under the text and name it productbg, grab the Rounded Rectangle Tool(U), and using a radius of 5px make your shape. Then set the the fill to 0%, and add an inner glow:
Step 9
Now we’re going to erase parts of the rectangle so that theres only 2 corners left. But since the layer has a layer style, we need to get rid of it before we can use the eraser. So lets create a new layer underneath our productbg layer. Then select the productbg layer and press Ctrl+E to merge them together, losing the layer style in the process but keeping the effect. Now we can use the Eraser Tool(E) to brush away most of the rectangle without worrying about the layer style messing up our work. I used a soft round 45px brush, here’s what I ended up with:
(Tip: you can create a new layer out of the bottom corner by making a selection around it and going to Layer>New>Layer via cut. I did this so I could reposition the bottom corner since I felt it was slightly out of place)
Step 10
This next part might end up being a little tricky, and it could take you a few tries of using the perspective tool before you get the result you’re looking for. With that said, lets go on.
We’re going to make an image of the product that the page is marketing now. I just grabbed a screenshot of the PSY website, since I don’t actually have anything to sell. You could do the same, or maybe you do have something you want to sell, either way, the final size of your product should be around 250×200px. Drag the layer into our document, then add a drop shadow and a stroke:
Step 11
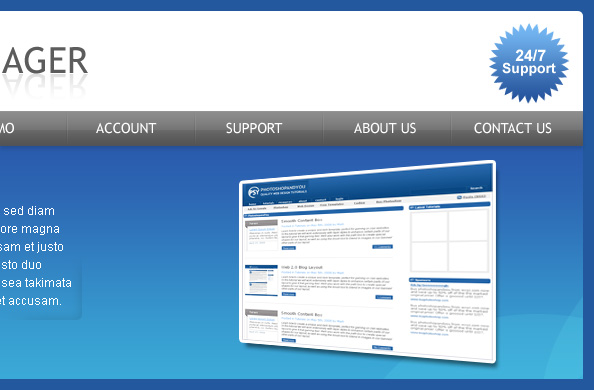
Here’s the tricky part. It’s time to add perspective to our product layer to make it pop out a little. Go to Edit>Transform>Perspective. Grab the top left corner and drag it down a little, until it looks realistic.
Once that’s done, I touched it up a little by adding in some abstract gloss on the bottom right. Create a new layer and name it gloss, set the mode to overlay, and the opacity to 10%. Then, grab the Ellipse Tool(U) and make some sort of shape in the bottom right corner. Don’t worry if it extends past the boundaries of our productbg layer. To fix that, while still having the gloss layer selected, Ctrl+Click on the productbg layer, select the Rectangular Marquee Tool(M), right click the selection, and click “Select Inverse”. Then press delete. I overlapped two shape for this. Here’s my result:
Step 12
Now lets create the middle part of our layout where we will display different packages that can be purchased. Create a new layer, set your foreground color to white, grab the Rectangle Tool(U), and create our background using a fixed size of 900×192px. Position it directly under our productbg layer. This part is optional, but I think it looks much better with it. Create a drop shadow (See our Drop Shadow tutorial if you don’t know how to make one), and position it on top of our new layer, 1px below the productbg layer. Set its opacity to 90%.
Step 13
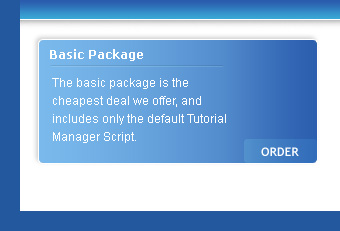
Now it’s time to make the boxes for our 3 packages. Create a new layer and grab the Rounded Rectangle Tool(U). Set the radius to 5px and the fixed size to 280×125px and make your shape. Add the following layer style:
Step 14
Create an indented line again just like we did in step 3, but this time make it horizontal. I ended up using overlay for my white line again and set the opacity to 16%, while the black line was 9%.
Step 15
Now add some text to the box. For the order button, I used Trebuchet MS bold size 12, with an anti-alias of smooth. To create the button, set your foreground color to white and create a new layer. Set the mode to overlay and the opacity to 14%. Then grab the Rounded Rectangle Tool(U) and set the radius to 3px. Create your shape.
Step 16
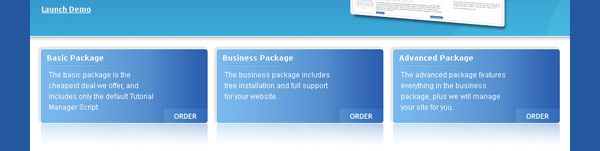
Now it’s time to reflect the bottom of the package box. Use the same method that we used for the text/logo in steps 4/5. Once that’s done, select all the layers in the layer palette that makeup our package box by holding either shift or control down and clicking on them. Then go to Layer>New>Group from Layers…, name it packagebox. Duplicate the layer group twice, and position them accordingly using the Move Tool(V).
Step 17
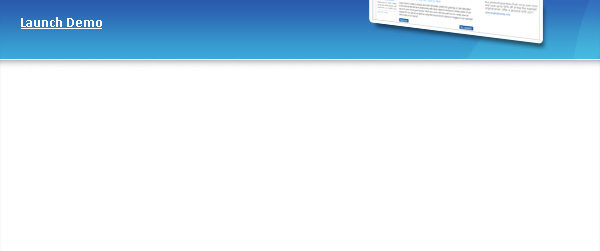
The remaining part of the layout for the most part is very basic photoshop work, and the parts that aren’t were already covered in the tutorial, so you should be able to create it yourself  However, I will give you a little help: Background color: #fdfdfd Line(stroke) color: #e2e2e2 Header text color: #2e70b8 Content text color: #616161 Footer text color: #5b96d4
For the background I have going on at the two top corners, you can use the method showed in the bottom part of step 11. Just keep creating shapes and overlapping them until you get something cool looking.
Final Result
Thanks for taking this tutorial guys, hope you enjoyed it!


30 Comments |
Add a Comment