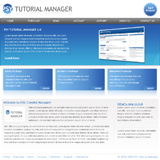
Final result:
Step 1
Set your foreground color to #298aeb, then grab the Type Tool(T) and enter the first part of your company name. I just used MW, my initials. I used Futura for my font, size 30, with a sharp anti-alias, but since this is a commercial font, you might not have it. A very good free alternative here is Trebuchet MS with the same settings.
Step 2
While the font looks ok right now, it’s a little boring. Let’s spice it up a little. We’re going to use a white stroke on a white background, and we’ll make it appear on
the lower portion of the text by adding some slight shading. Apply this layer style:
Step 3
Now that our text is looking pretty nice, lets add the second part of your company name. Set your foreground color to #6e7072 and use the same font settings as before, but make sure that you end up making a new layer so that you can position the text a few pixels to the right of our first type. Apply the same layer style we did in step 2 by copy pasting it over.
Step 4
Set your foreground color to #b3b2b2 and with a new layer, add your company info/slogan/etc under your company name. I used Futura font for this again, size 15, with an anti-alias of sharp. Again, Trebuchet MS with similar settings will yield almost the same result (Tip: set anti-alias to none if you use Trebuchet MS for this part). Give it the same layer style we used in steps 2 and 3.
Step 5
Now let’s add some graphics. Set your foreground color to #298aeb and create a new layer. Grab the Pencil Tool(P) and set the size to 2px. Then, to the left of the company info text, make something that looks like this:
Step 6
Now once again(and for the last time!) copy paste the layer style we used in steps 2, 3, and 4. Then position it like so:
Step 7
We’re almost done, let’s add an area where we can put a logo. Grab the Rounded Rectangle Tool(U) and set the radius to 3px. Create a new layer, and while holding shift, make a square shape. Then give it these layer settings:
Step 8
Now add your logo in. I didn’t really have a logo to use, so I just use Trebuchet MS as my font instead.
Final result
Thanks for taking this tutorial, check back soon for more!


9 Comments |
Add a Comment